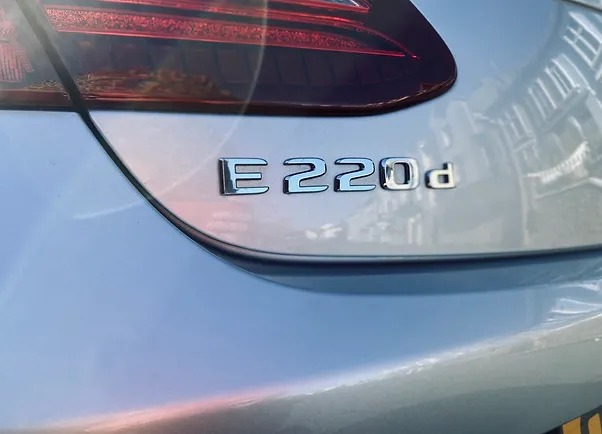
Debadging a car has become a popular customization choice among car enthusiasts and owners. This process involves removing the manufacturer’s logos, emblems, and model designations from the car’s exterior. While it may seem like a simple aesthetic change, debadging offers several benefits, such as enhancing the vehicle’s appearance, improving its resale value, and reducing maintenance hassles.
Your car, a reflection of your personal style and taste, is not just a mode of transportation but an extension of your identity. One of the most striking ways to make your vehicle uniquely yours is through the process of debadging. Debadging involves removing the manufacturer’s logos, emblems, and model designations from your car’s exterior, offering a range of benefits beyond just aesthetics. In this comprehensive guide, we will explore the many advantages of debadging, and then we’ll provide you with a detailed, step--step tutorial on how to execute this transformation safely and effectively.
Whether you’re an automotive enthusiast looking to give your ride a sleek, customized appearance or a car owner seeking to enhance its resale value, debadging can be an exciting and rewarding endeavor. As we delve into the process, we’ll shed light on why debadging is gaining popularity and how it can elevate your vehicle’s overall look and feel. So, if you’re ready to embark on this journey of car transformation, read on to discover the world of debadging and how you can make your automobile truly one-of-a-kind.
Benefits of Debadging
- Improved Aesthetics: Debadging can significantly enhance the overall look of your vehicle. By removing the emblems, logos, and model designations, you create a cleaner and more streamlined appearance. This minimalist aesthetic is popular among car enthusiasts and can give your vehicle a sleek and modern appearance.
- Personalization: Debadging allows you to personalize your car and make it stand out from the crowd. You can replace the stock emblems with custom badges or leave the area completely blank for a unique and understated look. This personal touch can help your car reflect your individual style and preferences.
- Easier Cleaning: Emblems and badges tend to collect dirt, grime, and wax residue over time, making it challenging to clean around them. By debadging your car, you eliminate these hard-to-reach areas, making it easier to maintain a clean and polished appearance.
- Reduced Risk of Theft: High-end car emblems are often targets for thieves. By removing these badges, you reduce the risk of having them stolen, which can be an expensive and frustrating experience.
- Enhanced Resale Value: While debadging is a reversible modification, it can positively impact your car’s resale value. Many buyers appreciate a clean and well-maintained exterior, and a debadged car may stand out as a well-cared-for vehicle.
Step--Step Guide to Debadging
Before you start, gather the following materials and tools:
Materials:
- Fishing line or dental floss
- Adhesive remover (Buy it here on Amazon)
- Microfiber cloths (Buy here on Amazon)
- Wax or polish (optional) (Buy here on Amazon)
- Custom badges (if you plan to replace the stock emblems)
Tools:
- Heat gun or hairdryer (Buy here on Amazon)
- Plastic trim removal tools (Buy here on Amazon)
- Paint-safe adhesive remover spray
- Isopropyl alcohol (for cleaning)
Step 1: Prepare Your Work Area
Park your car in a shaded or indoor location, as direct sunlight can make the process more challenging. Ensure your car’s surface is clean to prevent dirt from scratching the paint during the debadging process.
Step 2: Heat the Emblems
Use a heat gun or a hairdryer to warm the adhesive behind the emblems. Be careful not to overheat the paint; maintain a moderate distance (about 6-12 inches) from the emblem and keep the heat source moving. Be really careful at this stage, you could end up with a costly repair bill if you get too close to the paintwork with the heat.
Step 3: Start Cutting
With the emblem heated, use a piece of fishing line or dental floss to slide behind the emblem. Gently work it back and forth in a sawing motion to cut through the adhesive. Keep the line taut to avoid damaging the paint. Be careful when the badges eventually come away from the car, ensure that they don’t scratch the paintwork as they are removed.
Step 4: Remove the Emblem
Once the emblem is separated from the car’s surface, carefully pull it off. Use plastic trim removal tools to pry it away if necessary. Take your time to avoid damaging the paint.
Step 5: Clean the Residue
Use an adhesive remover spray to remove any leftover adhesive. Gently rub the area with a microfiber cloth to clean it. Be patient, as this may take a bit of effort.
Step 6: Clean and Polish (Optional)
After removing all adhesive residue, wash and wax the area to ensure a clean and polished finish. This step is optional but recommended for a flawless result.
Step 7: Replace with Custom Badges (Optional)
If you wish to personalize your car further, you can replace the standard emblems with custom badges. Ensure they are aligned properly and adhere to the manufacturer’s instructions for installation.
Conclusion
Debadging your car is a simple and cost-effective way to enhance its appearance, personalize it, and improve its resale value. By following this step--step guide, you can safely and effectively remove emblems and badges, transforming your vehicle into a unique and stylish work of automotive art.
Debadging your car offers a multitude of benefits, from aesthetic improvements and personalization to easier maintenance and a potential boost in resale value. It’s a relatively straightforward DIY project that allows you to give your vehicle a unique, custom look while retaining the option to revert to its original appearance if desired.
As you embark on this journey to transform your car’s exterior, remember to exercise patience and precision. Careful preparation and following the step--step guide will help you achieve a professional result, with a sleek and streamlined appearance that reflects your individual style and preferences.
Whether you choose to go completely badge-free or replace stock emblems with custom badges, debadging is an excellent way to make your car stand out on the road. Enjoy the process, and revel in the satisfaction of seeing your vehicle transformed into a personalized work of automotive art that turns heads wherever you go.